Just in case your search engine landed you directly on this page, other articles that relate to this one are
Xiegu G90 & Digital Modes – What the Digital modes are about (focusing at the moment on FT8
Xiegu G90 & the CAT Cable – Where the CAT cable comes into play and how to build one if needed (You are here)
Xiegu G90 & the CE-19 & Cabling – how to build the audio cables for the CE19 (You are here)
XIEGU G90 & FT8 – using the WSJT-X software and the Xiegu G90 to receive FT8
The CAT cable and what does it do
Before we go any further, I assume you have just got your Xiegu G90 (possibly one of your first HF Transceivers) and probably one of the first devices that you have that supports CAT. You have probably heard of CAT, but until now, not worked with it.
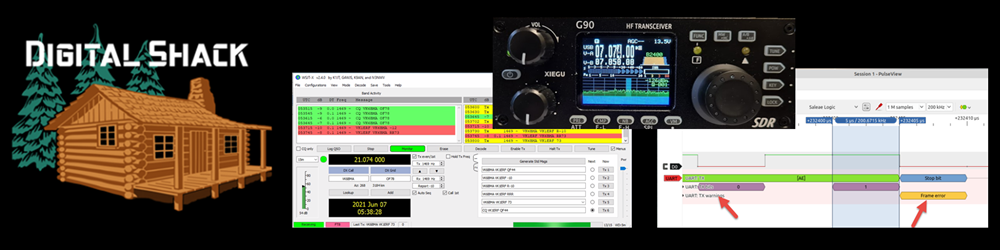
Very simply, a CAT (Computer Aided Tuning) interface is a generally a serial connection between a Computer and a Radio that allows the Computer and the Radio to communicate with each other. Each transceiver implements it differently, so one cable many not and in most cases does not work across different manufacturers transceivers, and each one may use a different connector. Functions such as frequency, transmit, bands, modes, volume, squelch and many others are controlled by CAT.
Now, first of all, the CAT Cable is not a pre-requisite for Digital Modes on the Xiegu G90 however, the G90 does support it and the cable is included with the G90, so why not try it out. When you can use it to integrate with your logging software, it can take the load off, especially when in DX Contests.
The cable that you need (and came with the Xiegu G90) looks similar to the one below, and if your thinking that this is the same cable for performing firmware upgrades on the Xiegu G90, then you are right, it is the same cable.

When you plug it into your computer/laptop you should see it under the Windows Device Manager as a USB to Serial or similar name, and it should show the COM port that it is emulating (usually COM3 or COM4) – Take note you will need it later. If you are running Windows 10, you should not need any special drivers.
Now we need to check that CAT control is working
Go to this location in your browser – http://www.w1hkj.com/files/flrig/
You will see an application called flrig-1.4.0_setup.exe. The version might change, but the name should be similar. Download and install on your Windows 10 PC. With your Cable plugged into the USB port on the computer and the other end plugged into the side of the G90 (the one under the Headphone Jack)

Now start the FLRIG software – it might come up telling you that it can’t talk to the Transceiver. That’s fine, we have not configured it yet. The screen may look similar to the following

The following screen should be what yours should look like for it to communicate with the G90. Just note that the main difference should be the COM Port – in my case, it was COM4, yours may be different.

The main things to concentrate on are, the RIG (2) – FLRIG now includes the Xiegu-G90 in its list of supported Transceivers (I think since October 2020). For this reason, you might find a lot of guides that talk about using the ICOM 7100 for the Xiegu G90. It will support some of the basic functionality, but now FLRig has its own G90 Profile, which supports more functionality. You may find other CAT software, that does not directly support the G90, so in this case, your only choice is to select the ICOM 7100 until they do.
Set your baudrate to 19200, select 1 stop bit, make sure all the other options are unticked. Make sure you have 0x88 selected, and the rest stays as default.
Finally click on INIT and if all is ok, you should see the Green “diamond” come on showing connected

And it will also popup the main rig window, where if everything is working, it should reflect the settings on your transceiver.
Well, you have now setup and understood how to setup your Transceiver for CAT control. Now you can look at the many applications that use CAT control, particularly logging software such as Ham Radio Deluxe and Log4OM, N1MM to name a few. (sometimes they call it Radio Control or similar). Just before you race off to test, remember, if you are having issues with particular software, then come back to the basic applications to perform tests.
Now you have the CAT Control working, lets look at what else we need to do to become involved in the digital mode communications.
Nothing is working – a True Story (or I can’t find my G90 CAT Cable)
When I first went to test my CAT cable, I located my cable and plugged it into the computer. What? no du-du sound that you hear when you plug in a USB device. That was worrying. Ok remove it and try again, again silence. Tried it on another computer, nothing. Tried it on one more, nothing. This was not a driver issue, it was not being recognised as a device being plugged in.
I contacted Amazon (where I bought the Radio through) and they were good. We came to an arrangement. I would locate a replacement cable (as sending cables back and forward was not really an option). So at this point, I could now open this device and see if there was a reason for this cable not working.
It was immediately apparent, why this cable had failed. Besides the black wire being disconnected (now I will be fair and say that this may have come off when opening this device – but that means it was weak to start with and this wire being off would not have stopped the USB device being detected), the solder quality on the chip was poor. Whilst the solder quality looks questionable under this non-magnified picture, under the microscope, it was clear that the chip was soldered off centre (which contributed to what appear to be numerous dry joints). After this picture was taken, I tried a bit of reflow therapy on this board, but gave up pretty quickly being too fiddly, especially as I had a better idea with a clear outcome.

At this point I decided to rebuild the serial interface with a known board that I had (actually had 3-4 of them) as the boards are only $2-$3 each (most likely to be clones).
The board is the FT232RL FTDI USB To TTL Serial Converter Adapter Module. If you drop that into your favourite search engine, you will find them on Ebay, Banggood, Aliexpress and most of the other online sites. It basically looks similar to this.

You are probably wondering that this looks very different to the original cable. You are right and you will need an additional Mini-USB cable to normal USB, but I prefer this as this allows me to select a longer cable. So all that is left is to make a cable to go to the 3.5mm stereo plug

As I already had a lead from the original cable. I just soldered the existing cable directly to the board (note I have listed the colours above if you have access to the original cable. If you are building one from scratch, you can use any colour you wish.
Just one thing to add, almost all these FT232RL FTDI USB To TTL Serial Converter has a jumper located on it for 3.3v or 5V Logic. Based on information (as I never had the original working cable) from groups.io Xiegug90 TechnicalAnalysis they are recommending 3.3v. I can confirm with this 3.3V setting, FLRig works fine. If you use the original cable, it has a 4th wire being the red wire. This is not used as it is only used if we are powering the device on the other end, which we are not.
Basically when finished, I used a couple of cable ties as strain relief and then covered most of the exposed parts with heatshrink. I plugged it in and was immediately recognised. I then finished by plugging it in the G90 and running FLRig, and was rewarded by everything working as it should.

Worked like a charm! Thank you!
Allen,
Thanks for your comments. Hoping the articles make it a little easier for anyone following a similar trail.
Regards
Bob
Thanks You saved me. Cable went bad. I had several FTDI’s in junk box. Works like a charm!
Jerry,
Great to hear…thanks for the feedback.
Seems like a common issue. Even my own cable the chip had been flow soldered with the chip skewed….and I suspect the same quality (poor soldering) happens on a lot more. I will take a guess and say that Xiegu is probably getting those cables made elsewhere (but I could be wrong). Like you have said and I think more and more people are keeping Spare FTDI cables, or at least FTDI modules to quickly build a cable up.
Bob
Thanks for a great set of tutorials! The latest version of Flrig has the G90 settings built in, and the setup is slightly different from yours.
For example, 2-StopBits is automatically checked, and the bottom two boxes are checked by default. These settings seem to work fine.
Would you still suggest using the settings you suggest, and why?
Thanks in advance.
Simon,
I appreciate your comments, thank you.
I appreciate the feedback and I will have a look at the latest FLRIG with G90 in the next week or so, as I do wish to keep these articles updated.
But to provide a preliminary answer, the difference between one and two stop bits may matter very little, especially now with many of the standard UART functions now performed in software. Basically the FTDI interface is just the interface from the USB to the Serial interface, with software performing the serial function. What this means is that the tight timing that we had in earlier years, is less critical now and at 19200 baud (which is regarded as slow) it continues to be less critical. The difference between 1 stop bit and 2 stop bit, was that the 2 stop bits gave it extra processing time, and with computer speeds nowadays and 19200bd, it is less critical. However I will add one caveat, is that one major change from my UART days and implementing it on Z80 based systems (Circa 1980’s), was that I was not dealing with RF, and I have now seen the effect RF can have on serial cables.
As for the two bottom tick boxes, it is highly likely on a USB interface they are not even implemented (remember a lot of the “options” are a carry over from the UART days). However please take this with a grain of salt, as i need to look at that closer.
I appreciate you raising this, as like everyone else, we are all continuing to learn, and I will update the article as soon as I get a moment.
Regards
Bob
Thanks for your reply Bob, I will wait for the results of your testing.
73, Simon M7WWX